Going on your first outdoor bouldering trip can be a really exciting stage in a climber’s journey. So what do you actually need to take with you to ensure that the trip is both safe and enjoyable? Below I will outline some of the key things to take.
Bouldering Pad
This is probably the most important thing that you will need to make sure you stay safe when it comes to bouldering outdoors. Bouldering pads help take some of the impact should you fall on a route.
Depending on the route you may actually need several bouldering pads and they may need to be moved around throughout the problem.
Bouldering pads come in various sizes, colours and with various features. They can also be pretty expensive so it is definitely worthwhile taking a look at plenty of different options and seeing which one(s) best suit your needs.
Check out a couple of the bouldering pads available now below.
-
 La Sportiva LASPO Bouldering Pad£200.00
Spotter
I mentioned in the last point about sometimes having to move your bouldering pads mid route. This is where a spotter comes in.
Sometimes the fall zone can be a bit treacherous and having another person there that can help you control you if you fall will significantly reduce the risk of you hurting yourself.
They can also help with a bit of moral support, advice on sending the project or just someone to chat to throughout the trip.
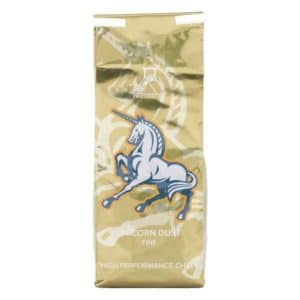
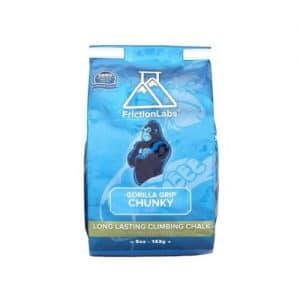
Chalk
Chalk is a must when it comes to climbing. When applied properly, it helps provide you with that bit of extra friction that can be the difference between sending and lying on your back looking up at the problem.
There are plenty of different types of chalk ranging from blocks of chalk, powdered chalk in different grades, chalk balls and liquid chalk.
Each of these different types have their pros and cons and in all honesty there is no one best chalk product out there. Everyone is different and different chalks work better for different people and that extends to the type of problem you are tackling too.
Liquid chalk can be a bit more long lasting for some people whereas others prefer a fine powder chalk that can be reapplied mid problem.
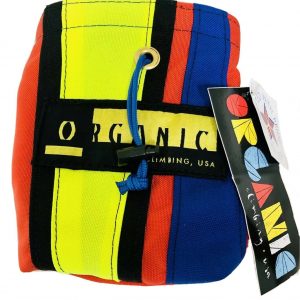
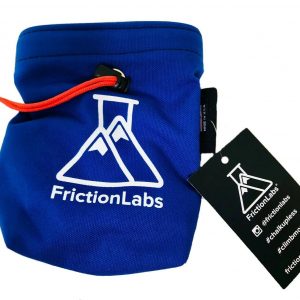
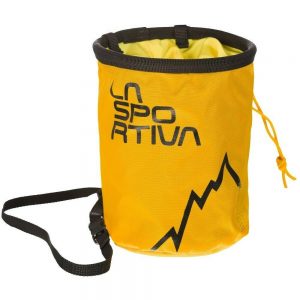
Chalk Bags
Depending on the type of chalk that you are using, you are likely to need a chalk bag too.
Again, these come in various shapes, sizes and colours with different features. A lot of this is down to personal preference and what works for you.
If you intend to take the chalk bag on the route there are plenty of options available. Likewise if you prefer to coat your hands pre route there are bucket style chalk bags which may work better for you.
Brushes
I mentioned before chalk can be a massive help in providing you with extra friction to help you on a route. It can also be a massive hinderance.
Excess chalk on a particular hold can actually reduce the friction you have and that is where climbing brushes come in.
A set of climbing brushes can be really useful in cleaning the holds giving you the best chance to send.
Climbing brushes come in various sizes and I’d recommend picking up a few different size brush heads so you can really get into the holds and get them nice and clean.
It is really good practice to leave the crag exactly as you found it so making sure you take any rubbish with you and brush the holds when your done is really important.
-
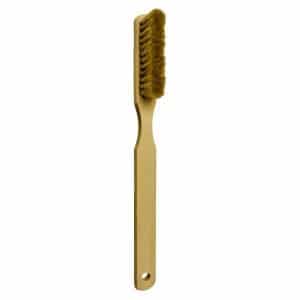 Ungraded Climbing Brush£4.00
Change of Clothes
This one will definitely depend where you are in the world but here in the UK generally it is sensible to take some waterproofs and a jacket.
It is really important to make sure you keep warm between attempts. This will result in better attempts and also reduce the likelihood of injury.
Again, depending where you are it is probably also a good idea to pack some suncream. The last thing you want to do after spending a few hours at the crag is to come back as red as a lobster.
Tape
Generally climbing on real rock is more abrasive for your hands than the holds at climbing gyms.
After travelling to get to the crag you don’t want to stop for a little crack, cut or scrape on your finger. Taping up is a great solution to allow you to keep going limiting further damage.
A couple of different widths of tape are always handy to have when going to the crag.
Basic First Aid Kit
From time to time you can get hurt when down at the crag and it is always a good idea to be prepared with a basic first aid kit.
Make sure this is stocked up before you go. Hopefully you won’t have to use it but it is better to have it there if you do need it.
Snacks and Drinks
Keeping refuelled throughout the sessions is really important. Often you are only at a location for a limited time so you should do everything that you can to make sure you make every attempt count.
This includes making sure you remain hydrated and give yourself plenty energy. There are plenty of high energy snacks out there and I’d recommend just trying a few and see what works best for you.
Well known crack climber Tom Randall often opts for a drink known as a Brown Cow (comprising of Coca Cola and full fat milk).
Rucksack
You’ll need something to carry your gear in and it is well worth investiging in a decent quality rucksack.
As with a lot of the things on this list they come in various designs and sizes and you need to work out what best suits your needs.
Having a quality rucksack that will survive plenty of trips to the crag is a more that a worthwhile investment.
Optional (Specialist Equipment)
There are a limited number of boulder problems out there that require very specific techniques such as hand jams and knee bars. There is some equipment out there that can make these techniques a bit more bearable.
Climbing knee pads and crack climbing gloves are both available but certainly by no means a necessity for the majority of bouldering trips.
Check out the location before you are going and see which routes you want to tackle. If they recommend these may be required it may well be worth picking them up for the sake of your hands and knees!
Optional (Crag Dog)
And the last thing… it is definitely optional but certainly raises most people’s spirits is having a dog with you.